Reset Netgate / pfSense Admin Password from macOS (Serial Console Guide)
This walkthrough documents the cleanest recovery path for Netgate appliances running pfSense CE or pfSense Plus using a MacBook and the serial console this way we may avoid config loss, performing a factory reset, or a whipe/reinstall.
This is written as a practical runbook you can keep around for the next time someone locks themselves out.
What This Fixes (and What It Doesn’t)
This procedure:
- Resets the admin webConfigurator password
- Preserves your full pfSense configuration
- Works even if the web UI is unreachable
This does not:
- Recover encrypted backups
- Fix a corrupted install
- Repair broken disks or failed upgrades
Requirements
Hardware
- Netgate appliance (6100 / 2100 / 1100 / similar)
- Console cable:
- USB-C console cable (newer Netgate models)
- USB-A to RJ45 serial console cable (older models)
- MacBook
⚠️ Many USB-C cables are charge-only. If nothing shows up on your Mac, the cable is the first thing to suspect.
Step 1 — Identify the Serial Device on macOS
Plug the console cable into your Mac and the Netgate console port.
List available serial devices:
ls /dev/tty.*
Typical results look like:
/dev/tty.usbserial-XXXX
/dev/tty.usbmodemXXXX
/dev/tty.usbserial-A10XXXX
You will use one of these device paths in the next step.
Step 2 — Attach to the pfSense Console (115200 8N1)
pfSense console settings:
- 115200 baud
- 8 data bits
- No parity
- 1 stop bit
- No flow control
Option A — Built-in macOS screen (works, but finicky)
You can connect using macOS screen:
screen /dev/tty.usbserial-XXXX 115200
Replace the device path with the one you discovered above.
Practical notes from real-world use:
- Output can appear blank or garbled if the wrong device node or baud rate is used.
- Attaching after the device has already booted can make it seem like “nothing is happening.”
- Exiting
screenis non-obvious under pressure (Ctrl+A, thenK, thenY). - In time-sensitive recovery scenarios, this friction is easy to trip over.
If screen behaves unpredictably, it’s usually faster to switch tools than to fight it.
Option B — Homebrew + minicom (recommended on macOS)
In practice, a dedicated serial client is more predictable on macOS. Installing Homebrew and using minicom reduced friction and made the console session reliable and repeatable.
Install Homebrew (if not already installed):
- Homebrew will prompt to install Apple Command Line Tools (Xcode CLT) if missing. Let that complete first.
Install minicom:
brew install minicom
Connect with minicom:
minicom -D /dev/tty.usbserial-XXXX -b 115200
I ended up using minicom because it provided:
- More reliable display of console output
- Clearer connection state
- Less guesswork when attaching during boot
- A smoother workflow during recovery when you’re already under time pressure
If the Console Is Blank or Garbled (applies to both tools)
- Press Enter once or twice to wake the console.
- In this case, a restart was not required — the console became responsive after typing
exitand pressing Enter. Power-cycling can be necessary in some situations, but try interacting with the console first before restarting the appliance. - Power-cycle the Netgate while the session is already connected:
- Leave the terminal window open
- Unplug power (or PoE Ethernet if applicable)
- Wait 10–15 seconds
- Reconnect power and watch for boot output
- Do NOT press the reset pin unless you intend to factory-wipe the device
- Confirm the baud rate is 115200 (garbage text = wrong baud)
- Try the alternate device node (
usbmodem*vsusbserial*) - Verify the USB cable supports data (many USB‑C cables are charge-only)
Power-cycling is safe when the appliance is idle or wedged, but avoid doing this during upgrades or active disk writes.
You can reset the password here when connected via console.
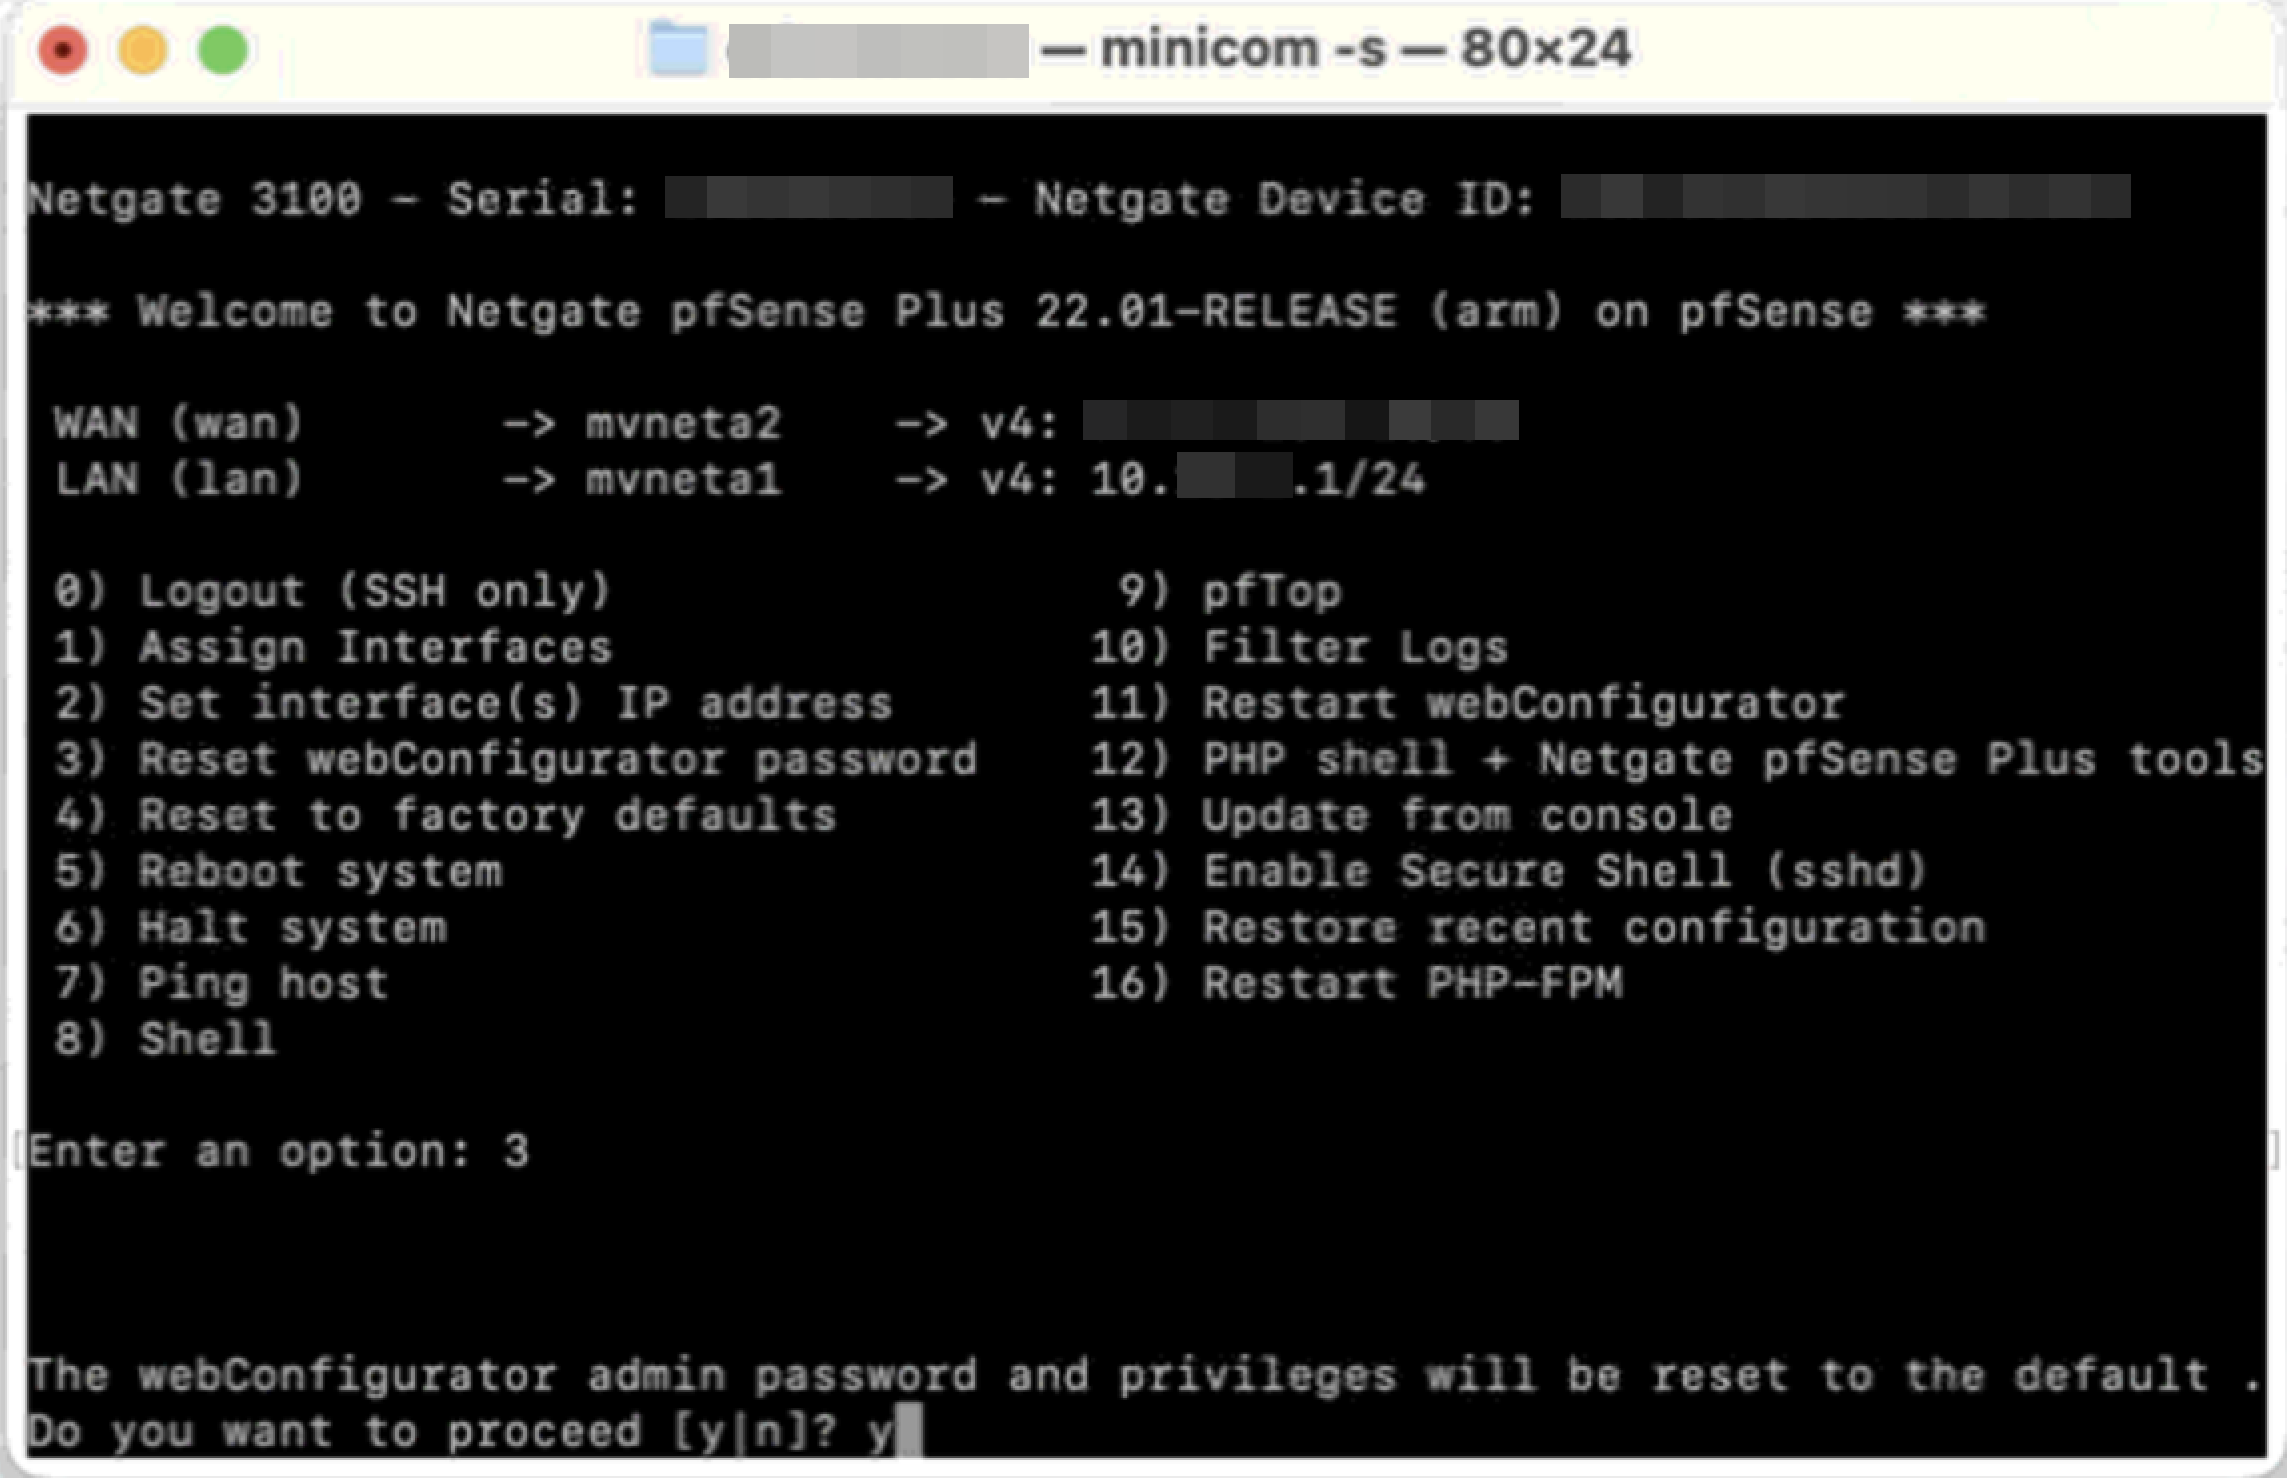
Step 3 — Reset the Web UI Password
Once pfSense boots, you’ll see the console menu:
- Logout
- Assign Interfaces
- Set interface(s) IP address
- Reset webConfigurator password
Choose:
#4
This resets the admin password.
Default Credentials After Reset
pfSense CE
- Username: admin
- Password: pfsense
pfSense Plus
- Password is reset via console — immediately set a new password after logging in
Step 4 — Exit the Serial Session Cleanly
screen
Ctrl + A, thenK, thenY
minicom
Ctrl + A, thenX, then confirm exit
Step 5 — Log Back Into the Web UI
https://
Log in and immediately change the password:
System → User Manager → admin → Change Password
Troubleshooting
Serial device busy:
lsof | grep tty.usb
Permission denied:
sudo screen /dev/tty.usbserial-XXXX 115200
No device appears:
- Try another USB port
- Try another cable
- Reboot macOS
Last Resort: Recovery Reinstall
- Download the Netgate recovery image
- Flash USB with Balena Etcher
- Boot the Netgate from USB
- Reinstall pfSense
- Restore your config backup
This is one of those quiet documented future quality-of-life fixes that saves me real downtime.